

A strong knee isn’t just about how much weight you can push around it. It’s about understanding how the joint actually moves, which muscles control each part of that movement, and then training those muscles the right way for whatever you’re dealing with.
Most people think of the knee as a simple hinge: it bends, it straightens, that’s the whole story. But there’s more going on than that. The knee also rotates and shifts slightly side to side, and if you only train it as a hinge, you miss a big part of what actually builds real strength and keeps the joint out of pain.
Once you understand how the knee moves and which muscles create that movement, the next question is how to train it, especially depending on what’s bothering you or what you’re trying to accomplish. Before I get to the exercises, I want to walk you through one idea that changes how you should be training this joint: the difference between a fixed point and a mobile point. Once that clicks, these five exercises will make a lot more sense, and you’ll be able to rebuild real strength in your knee without adding stress to it.
RELATED: 5 Daily Exercises That Reverse Aging Better Than Gym Workouts After 60
How Your Knee Actually Moves
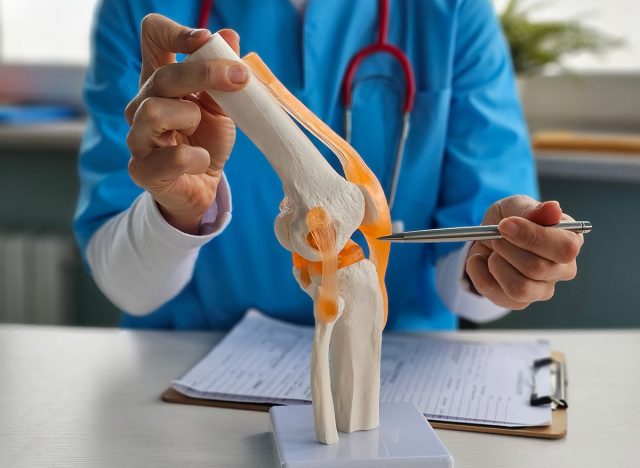
When you look at the knee, it’s traditionally described as a hinge joint. You’ve got the femur, the patella sitting in front of it, and the tibia below. The general idea is that either your lower leg is fixed and the femur hinges on top of it, or the femur is fixed and the lower leg hinges underneath it.
That’s true, but it’s only part of the picture. What gets missed is the knee’s rotational capacity, along with a small amount of side-to-side flexion. If you only think of the knee as a hinge, you miss a big part of the tibial and femoral torsion that’s actually happening. Look closely at the tibia and you’ll notice a slight concavity, a spot where it sinks in, and that’s exactly where the femur sits into it. Add in the ligaments and the meniscus, and you can see why the joint is more complex than a simple door hinge. There’s flexion and extension of the femur on the tibia, flexion and extension of the tibia on the femur, and both combine with a roll and a glide as the two bones move across each other. That roll and glide is also where the rotational component comes from.
Understanding which muscles create each of these movements, the extension, the flexion, and the rotation, matters because it tells you how to train them. And how you train them depends on what you’re dealing with. If you’re in pain, it depends on what’s causing it. If you’re pain-free, it depends on your goals.
The next piece is understanding the fixed point and the mobile point. Take a squat: your foot is fixed to the ground, so as you sit back and down, your femur is the part that has to move. There’s a small amount of forward and backward glide in the tibia too, and a bit of rotation, but the bulk of the movement comes from a fixed lower limb and a mobile upper limb.
A seated knee extension works the opposite way. Your femur stays fixed in place, and the movement comes entirely from your lower leg swinging forward, a fixed femur and a mobile tibia. Those are two very different loading patterns, and understanding how much of your training you need from each one is one of the most important pieces of building real knee strength, whether you’re working out of pain or training for performance.
The Muscles That Control Your Knee

A handful of muscle groups cross the knee joint, and each one contributes something different to how it moves.
Your quadriceps come down the front of your thigh and attach by a tendon into the patella, which is what moves your kneecap up and down as the quads contract. The angle each part of the quad crosses the joint matters too. They sweep across from slightly different angles on each side, and the VMO in particular plays a big role in creating rotation at the knee.
Your adductors come off the pubic bone and the inner thigh, then travel down and across into a spot called the pes anserine. Because they cross the joint at an angle, they contribute some rotation and some side bending. On the outer side of the leg, the iliotibial band attaches through the outside of the knee and pulls the opposite direction, contributing mostly side bending and a little lift to the lower limb.
On the back of the leg, your hamstrings cross the entire knee joint and insert at several different points into the tibia, with connections into the meniscus as well. That’s worth knowing if you’re dealing with a meniscus issue or a PCL injury, since your hamstrings tie directly into that anatomy. The hamstrings handle knee flexion, pulling the knee back, and because of where they attach, they also create a good amount of rotation.
Finally, your gastrocnemius, your calf muscles, sweep up from the lower leg and cross the knee joint, attaching on either side of the femur. They contribute to that rotational movement as well.
Once you understand where each of these muscles attaches and what it does, you can build a program that strengthens the entire knee, not just the front or the back of it. That means training both directions: fixing the femur to create more movement at the tibia, and fixing the tibia to create more movement at the femur. Here are the five exercises I use to do exactly that.
RELATED: The 12-Minute Morning Routine That Builds More Strength Than Lifting Weights After 65
The Squat (Fixed Lower Limb)
This version of the squat trains a fixed lower limb and a mobile upper limb. Your tibia stays put while your femur does the moving, which is one half of the fixed-and-mobile pattern your knee needs to be strong in.
How to Do It:
- Stand with your feet approximately hip-width apart.
- Adjust the width and turnout of your feet until both legs are symmetrical and the position feels comfortable on your knees.
- Set your posture with a slight tuck of your pelvis and a slight tuck of your chin.
- Push your knees forward to fix your tibia in place.
- Sit back and down into your squat, letting your femur move while your tibia stays still.
- Drive back up to straight knees, keeping your knees pushed forward so your tibia stays fixed the whole time.
Avoid These Mistakes:
- Don’t let your tibia shift forward or back during the squat. Keeping your shin still is what makes this a fixed lower limb, mobile femur exercise.
- Don’t let your feet sit at uneven widths or angles. Match both sides so you’re loading the knee symmetrically.
Form Tip: Push your knees forward first to lock in the fixed point before you start lowering into the squat.
The Seated Knee Extension (Fixed Femur)
This one flips the pattern. Instead of fixing your tibia and moving your femur, you fix your femur and create the movement down at your tibia and fibula. Training both directions is what builds complete strength through the knee.
How to Do It:
- Sit on a chair, bench, or leg extension machine so your femur is fixed in place.
- Hold on for a bit of support if you need it.
- Extend your knee joint, straightening your lower leg while your femur stays completely still.
- Lower back down with control and repeat.
Avoid These Mistakes:
- Don’t let your femur shift or lift as you extend. It needs to stay fixed for your tibia and fibula to do the work.
Form Tip: Keep a light hold on the chair or bench for support so you can focus entirely on moving from the knee down.
RELATED: 4 Wall Exercises That Flatten Lower Belly Faster Than Sit-Ups After 65
The Hamstring Curl (Fixed Femur)
Same fixed-femur, mobile-tibia concept, now applied to knee flexion for your hamstrings and calves. You can also change the angle of your foot to shift which part of the hamstring is doing the work, since the different hamstring muscles attach at different points and create rotation.
How to Do It:
- Get into a fixed position with little to no movement from your femur.
- Curl your lower leg up and set it back down, letting your tibia and fibula do all the movement.
- Keep your foot straight to target more of the middle hamstring.
- Turn your foot out slightly to target more of the lateral hamstring.
- Turn your foot in the opposite direction to target more of the medial hamstring.
Avoid These Mistakes:
- Don’t let your femur move during the curl. The fixed point has to stay at your femur for your hamstrings to create the mobile point at your tibia and fibula.
Form Tip: Rotate your foot slightly in different directions between sets to work the medial, middle, and lateral parts of your hamstring.
The Hip Bridge (Fixed Lower Limb)
This is the opposite of the hamstring curl. Now your tib and fib become the fixed point, and your femur becomes the mobile one, which rounds out the fixed-and-mobile training your hamstrings and glutes need.
How to Do It:
- Lie down and set up in a traditional hip bridge position with your feet pushing down into the floor.
- Create a slight tuck or roll of your pelvis.
- Drive your hips up.
- Roll your hips back down with control.
Avoid These Mistakes:
- Don’t let your shin move during the bridge. Keeping your tib and fib fixed is what allows your femur to become the mobile point here.
Form Tip: Tuck or roll your pelvis back before you drive your hips up. It sets the fixed point at your shin correctly.
RELATED: If You Can Hold These 3 Yoga Poses After 55, Your Balance Is Better Than Most
Bonus: The Butterfly Foot Mobility Technique
This one’s a bonus for foot mobility, not the knee, but it pairs well with the other four exercises if your feet feel stiff or achy. It works by pumping the small spaces between the bones of your foot using ankle movement combined with finger and thumb pressure.
How to Do It:
- Cross one leg over the other so you can reach your foot comfortably.
- Find the interosseous space between two of the bones on top of your foot and place your fingers there, with your thumbs in the same space from underneath.
- Move into plantar flexion and press up and under with your thumbs while your fingers spread the top of the foot apart.
- Move into dorsal flexion and press in with your fingers while your thumbs spread that space apart.
- Create a smooth, continuous pump between plantar and dorsal flexion, letting your fingers and thumbs follow the movement.
- Move to the next junction, between your second and third toe, and repeat.
- Work through all five toes and all four junctions between them to cover every joint in the foot.
Avoid These Mistakes:
- Don’t rush the pump. Move slowly enough to actually feel the plantar and dorsal flexion driving the spreading action at each junction.
Form Tip: Move slowly enough that you can feel your fingers and thumbs actively spreading each junction, not just following along.
The post 5 Home Exercises That Rebuild Knee Strength Without Joint Pain After 60 appeared first on Eat This Not That.
