

Can you pass all four? Use these hip checks to see where you stand after 60.
Strong hips make it easier to trust your lower body after 60. They help you get out of a chair, climb stairs, and keep your stride feeling strong when you’re on your feet for a while. They also give you a better base for strength training, so they’re worth paying attention to long before anything starts feeling weak.
Hip strength comes from more than squeezing your glutes. You want to extend your hips, control them one side at a time, and produce force from a standing position. That’s why testing a few different movements gives you a much better read than relying on one exercise.
The four exercises here cover those jobs without getting overly complicated. You’ll start with a basic bridge, move to a single-leg version, then take that strength into a squat and a hinge. Completing each standard with control after 60 is a strong sign that your hips are doing their job well.
Use these movements as a check-in, then come back to them after a few weeks of training. Below, I’ll walk through what each exercise tells you, the standard to aim for, and how to adjust the movement if you’re still building toward it.
Glute Bridge
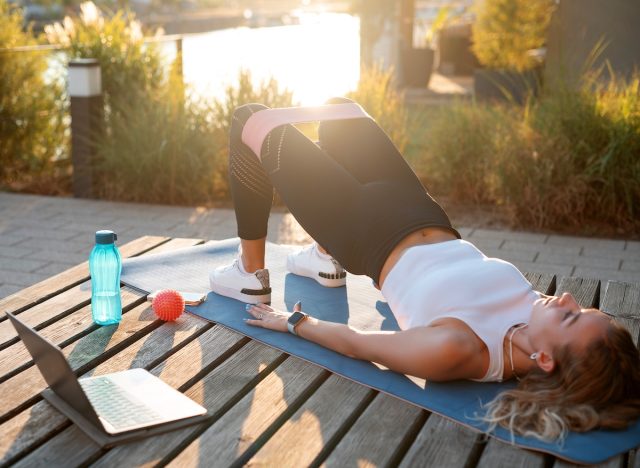
The glute bridge gives you a clean look at hip extension. Your glutes have to lift your pelvis and finish the rep without your lower back doing the work. If you can repeat that motion with the same height and control, you’ve got a solid foundation for stronger standing movements later in the test.
Muscles Trained: Glutes, hamstrings, core.
How to Do It:
- Lie on your back with your knees bent.
- Place your feet flat on the floor about hip-width apart.
- Brace your midsection.
- Press through your feet and lift your hips.
- Squeeze your glutes at the top.
- Lower with control.
- Repeat for the full set.
Top-Tier Standard: Complete 15 clean reps while reaching full hip extension and keeping your pelvis level.
Recommended Sets and Reps: Perform 2 to 3 sets of 12 to 15 reps. Rest for 45 seconds.
Best Variations: Banded Glute Bridge, Elevated Glute Bridge, Slow-Tempo Glute Bridge.
Form Tip: Finish the rep with your glutes, then lower before your low back starts adding extra motion.
Single-Leg Glute Bridge
Take one foot off the floor, and each hip suddenly has a lot more responsibility. The single-leg bridge is useful because it shows whether one side can create the same hip extension without the pelvis dropping or rotating. After 60, that side-to-side control matters because walking and stepping constantly shift your weight from one leg to the other.
Muscles Trained: Glutes, hamstrings, core.
How to Do It:
- Lie on your back with both knees bent.
- Lift one foot from the floor.
- Keep the working foot planted.
- Brace your core.
- Press through the planted foot and raise your hips.
- Lower slowly.
- Finish your reps before switching sides.
Top-Tier Standard: Complete 8 controlled reps per side while keeping your hips level throughout the set.
Recommended Sets and Reps: Perform 2 to 3 sets of 6 to 8 reps per side. Rest for 45 to 60 seconds.
Best Variations: Marching Bridge, Feet-Elevated Single-Leg Bridge, Paused Single-Leg Bridge.
Form Tip: Keep your belt line level as you lift.
Goblet Squat
By the time you reach the goblet squat, your hips have to contribute while the rest of your lower body handles a full standing movement. The glutes help drive you out of the bottom, and the added dumbbell gives the exercise enough resistance to make the test meaningful. Ten strong reps at a consistent depth show you can use your hip strength through a movement that carries over well to everyday life.
Muscles Trained: Glutes, quads, adductors, core.
How to Do It:
- Hold a dumbbell close to your chest.
- Stand with your feet about shoulder-width apart.
- Brace your core.
- Bend your knees and sit your hips down.
- Lower until your thighs reach at least parallel.
- Press through your feet and stand tall.
- Repeat with the same depth each time.
Top-Tier Standard: Complete 10 controlled reps with a challenging dumbbell while reaching at least parallel.
Recommended Sets and Reps: Perform 3 sets of 8 to 10 reps. Rest for 60 to 90 seconds.
Best Variations: Bodyweight Squat, Box Goblet Squat, Pause Goblet Squat.
Form Tip: Keep the weight close to your chest and stay balanced through your whole foot.
Dumbbell Romanian Deadlift
The RDL tests your hips from a different position. You push your hips back, load the muscles along the back of your legs, then drive your hips forward to stand. A strong hinge shows you can create force without turning the movement into a squat, which is a skill I want people to keep as they get older.
Muscles Trained: Glutes, hamstrings, core, upper back.
How to Do It:
- Hold a dumbbell in each hand.
- Stand with your feet about hip-width apart.
- Soften your knees.
- Push your hips backward.
- Lower the dumbbells along your thighs until you feel tension through your hamstrings.
- Drive your hips forward and return to standing.
- Repeat with control.
Top-Tier Standard: Complete 10 clean reps with a challenging pair of dumbbells while keeping the hinge consistent from start to finish.
Recommended Sets and Reps: Perform 3 sets of 8 to 10 reps. Rest for 60 to 90 seconds.
Best Variations: Kettlebell RDL, B-Stance RDL, Slow-Tempo Dumbbell RDL.
Form Tip: Let the hips travel backward and stop the descent when your hamstrings tell you you’ve reached your range.
What Completing All 4 Exercises Says About Your Hip Strength

Making it through all four standards gives you a useful picture of hip strength after 60. You’ve shown that you can extend the hips from the floor, control one side at a time, and handle resistance once you stand up.
Pay attention to where the test feels easiest and where you have to work. The single-leg bridge may expose a side that needs more attention, or the RDL may show that your hinge still needs practice. That information makes the test useful because it gives your next few weeks of training a clear direction.
When all four movements feel strong and controlled, your hips are in a very good place. Keep training them, then revisit the same standards later and see what has changed.
How to Keep Building Hip Strength After 60
Hip strength improves when you keep giving the muscles a reason to adapt. Use loads you can control, progress gradually, and keep the movement quality high enough that the target muscles stay involved.
- Build the bridge first: Own full hip extension before making the floor exercises harder.
- Give each side attention: Single-leg work helps keep one hip from doing more than its share.
- Add weight gradually: Move up when your current dumbbells feel steady across the full set.
- Use controlled tempos: Slowing the lowering phase can make a familiar exercise challenging again.
- Train your hips regularly: Two or three exposures per week can give you plenty of practice without making every session a test.
- Reassess every few weeks: Use the same standards and look for stronger reps, better control, or a little more load.
Strong hips support a lot of what you want to keep doing after 60. If you can hit all four standards with clean reps, you’ve built an impressive base. From there, keep adding strength and let these exercises show you how far you’ve come.
References
- Lanza, Marcel B., et al. “Systematic Review of the Importance of Hip Muscle Strength, Activation, and Structure in Balance and Mobility Tasks.” Archives of Physical Medicine and Rehabilitation, vol. 103, no. 8, 2022, pp. 1651–1662. https://doi.org/10.1016/j.apmr.2021.12.008
- Gafner, Simone C et al. “Hip muscle and hand-grip strength to differentiate between older fallers and non-fallers: a cross-sectional validity study.” Clinical Interventions in Aging, vol. 13, 1- 8. 21 Dec. 2017, doi:10.2147/CIA.S146834
